Zimbra Tip: Contacts and Address Book management
This week’s Zimbra Tip is about Contacts and Address Book management. These tips are easy to understand and implement. The great news is that these tips apply to all 3 service levels of the XMission Zimbra suite.
Viewing Contacts in Address book
To access Contacts, click on the Address Book pane in the web interface or Zimbra Desktop client.
You can view your contacts either as a list or as contact cards. To change the view click on the View button and select either List or Cards. Personally, I prefer the List view.
Adding a new Contact to your Address Book
To add contacts just click the New button, then enter information in the appropriate fields.

Click "New" to create Address Book entry.
You can also add a contact directly from email by using right+click (Windows) or option+click (Mac) on the senders name, select Add to Contacts in the pop-up menu. Complete the information in the fields provided and Save.
Importing your Contacts
If you are using another contact manager program, you can import your existing contacts by saving them in “Comma-Separated Values” (.csv) format. See the program’s Help file for instructions on doing this. Note: For Apple Address Book, there is a useful utility by Antonio Lore called ab2csv. XMission does not support this app but Mac users find it simple to use.
To import your contacts into Zimbra, click on the Preferences pane and then select the Address Book pane. Browse for the CSV File and then click the Import .CSV File button. You will be able to name the contact list and assign the folder a color of your choice. That is it, you are done.
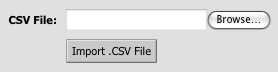
Import .CSV File, found in Preferences pane.
Adding Emailed Contacts to your Address Book automatically
Zimbra can automatically add names and email addresses to your Emailed Contacts list from the email addresses you send to. To enable this feature, click the Preferences pane and check the “Add new contacts to ‘Emailed Contacts'” box. I find that every now and then I have to go through and delete temporary addresses, such as those used by craigslist.org and other services.
Creating a new Address Book
The ability to have multiple address books is a very useful Zimbra feature. To create a new address book, first go to the Address Book pane and click New Address Book above your list of contacts. Name your new address book and select a color for it. Click OK and the new address book will appear in your list of address books. Easily move contacts from one Address Book to another by clicking and dragging Contact(s) from one Address Book to another.
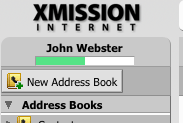
Simply click on New Address Book to create a new one.
Sharing your Address Book
To share an address book, click on the address book you would like to share and select “Share Address Book” from the pop-up menu.
Sharing with Internal users
You can share with individuals or groups on your XMission Zimbra domain. This is very similar to the process used to share calendars with other Zimbra users as covered in a previous post about Calendar sharing. Set the access controls and Zimbra will send email Share Request to the user(s) you selected. Upon accepting the share, the Address Book will appear in their list of Address Books. Any changes you make to this address book with appear in their share. Note: If you grant other users Manager status, any changes they make will show up in your contacts folder. Always be certain how much access you want others to have before sharing folders.
Sharing with External guests
To share with external guests, simply provide their email address and set a password for them. XMission’s Zimbra server will email them with their login information and a URL allowing them to download a .CSV file of your shared Contacts folder. Note: When you use external guest or public settings on an address book it is always read-only.
Public sharing
You can also make an address book publicly available. Follow the process to share your Contacts folder of choice, set to Public. This will show a custom URL you can provide to anyone. Copy this URL for future reference. Next, click the OK button to complete setting Public permission for this Contacts folder. Email your sharing URL and the end user can download the .CSV file.
Creating a Distribution List (Mailing List)
All XMission Zimbra accounts support distribution lists. To create lists, select New Contact Group from the New pop-up menu. Enter a name for your distribution list and then enter email addresses in the “Add Members to this Group” box. You can search your Contacts folder, the Global Address List, and your Personal and Shared Contacts folders for email addresses to add to your list or enter them manually in the box below. This is very slick. I use this to create custom invite lists for events and my other email list needs. Distribution Lists may have limitations on the number of addresses allowed as large lists can unduly tax the mail server. Note: It is a courtesy to always use BCC when sending to large email lists, simply enter your email address in the To: field so they know it is from you.
Searching for Contacts
Quickly find a contact by using the Search tool in the Zimbra web interface or Zimbra Desktop client. Type part of the name you are searching for in the box and then click the Search button (or hit return) to find your contact.
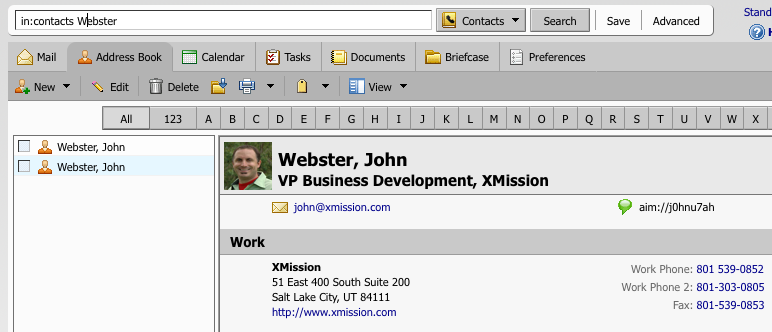
Use the Search field to find Contacts in your Address Book.
Need additional help?
For more help click the Zimbra Help button or visit the XMission Zimbra Support pages and the Zimbra forums.
Those are the basics of sharing your Contacts using the XMission Zimbra Suites. It is pretty simple and intuitive.
Thanks for reading and should you need our help just give us a call! Together we can find the best solution for your needs with one of the 3 distinct levels of XMission Zimbra hosting.
Zimbra Tip: Calendar Sharing New Surroundings for XMission Sales
Comments are currently closed.
How can I mange categories,
and how many categories I can choose?
Regards
Ulrich Müller
I want to create address book for all users of the zimbra account.
Hanson – Unless disabled by the domain administrator there is a shared address book for the domain. This includes GAL (Global Address Lookup) which also does auto-completion in the webmail interface during email address input.
With the rich functionality of the Zimbra webmail interface the domain administrator and users alike can create and share Address Books, Documents, Files, Tasks, Email folders, and much more.
If you have a specific question please feel free to post it here.
When I am ready to compose a new e-mail I click on TO and the SELECT ADDRESS
screen appears. I can select an address, cc, or blind cc whatever I want.
But I can’t add, change or delete an address to this screen. How do I do that?
Hello Joseph – This “Select Address” pop-over screen does not allow modification of address book entries. (To modify any contact information you need to do this via the Address Book tab. Select the recipient to modify and type “e” or press the “Edit” button in the webmail window.)
To remove a selected address from the “Select Address” screen simply select it from the window to the right and click “Remove.”
Something to remember about Zimbra is that it will auto-complete email addresses, simply begin typing the recipient name in form filed next to the To:, CC:, or BCC: button and select from the names that appear. If you have multiple matching names continue typing the full address or use the arrow key to highlight the recipient address. When highlighted you can use your “tab” or “return” keys to complete the selection.
I am happy to help you with any additional questions. Please email me directly or post them here. Hope this response helped.
Switching from Exchange to Zimbra. I receive a lot of contacts as attachments through email. Is there an ‘Update Existing’ contact feature in Zimbra. I have been unable to find one. So now it is creating new contacts and I have to go back and delete the old one. Any Suggestions?
-Stuart-
I’ve made three address books to email one group of people (since Zimbra and/or my computer can’t handle emailing everyone in one go) and I seem to have some addresses that are in both lists; is there any way I can fix this? I don’t want to send duplicate emails to people!
Sarah J,
XMission’s Zimbra service supports sending to a very generous number of addresses in the TO: CC: and BCC: fields. Although email etiquette suggests whenever emailing more than a few individuals it is best to utilize the BCC to avoid exposing email addresses.
If you are having issues and care to share the specifics please email me directly. We can help.
Let’s get to your question. So you have three unique Contact Groups and want to clean them up to ensure no duplicates. This isn’t easy but it can be done and here is how.
Create a new Address Book folder called “My Contact Groups” (or whatever naming works best for you) and then move these groups into this folder.
Next, click on the “Preferences” tab in the Zimbra web interface and click on “Import / Export” in the navigation bar on the left.
You will want to “Export” the “Account contacts”. The plan would be to export in a format an external program, such as Excel/Word/OpenOffice/Etc. can read. Next to “Source” you will use the drop-down to select the “My Contact Groups” folder. Then click “Export”.
From here you open the files, say in Excel, and sort them how you wish. My assumption is you have a big list separated into 3 group due to size so using the external program to sort them alphabetically and then delete duplicates.
Here I would suggest creating new Contact Groups, cut the list from Excel into appropriate sizes, and use the “Or enter addresses below (comma separated)” field on the lower right to import your corrected list.
Save the Contact Group and you should be all set. (You can keep or delete the old Contact Groups at your discretion.)
— John @ XMission.com
Stuart H,
In regards to adding to existing contact there is no such function in the Zimbra web interface at this time.
Something you can do it to add it to your contacts list and then use the “Contact Cleaner” zimlet in the web interface or Zimbra Desktop application to merge duplicate entries. To use this simply click the Address Book tab and then in the left navigation bar scroll down to “Zimlets” and click on “Contact Cleaner.” The system will compare all your contacts and you can choose how you wish to manage the duplicates.
Hope this helps.